Finding the database in AWS
All of the following sections start from the database instance page in AWS. To find this:- Head to the RDS homepage by typing RDS in the search box at the top of the AWS console.
- Ensure you are in the correct region in the top right (Virginia, Ohio, etc.)
- Select the database you want to connect to from the list. If your database is part of a cluster, choose the specific instance within the cluster that you want to connect to.
Finding connection details
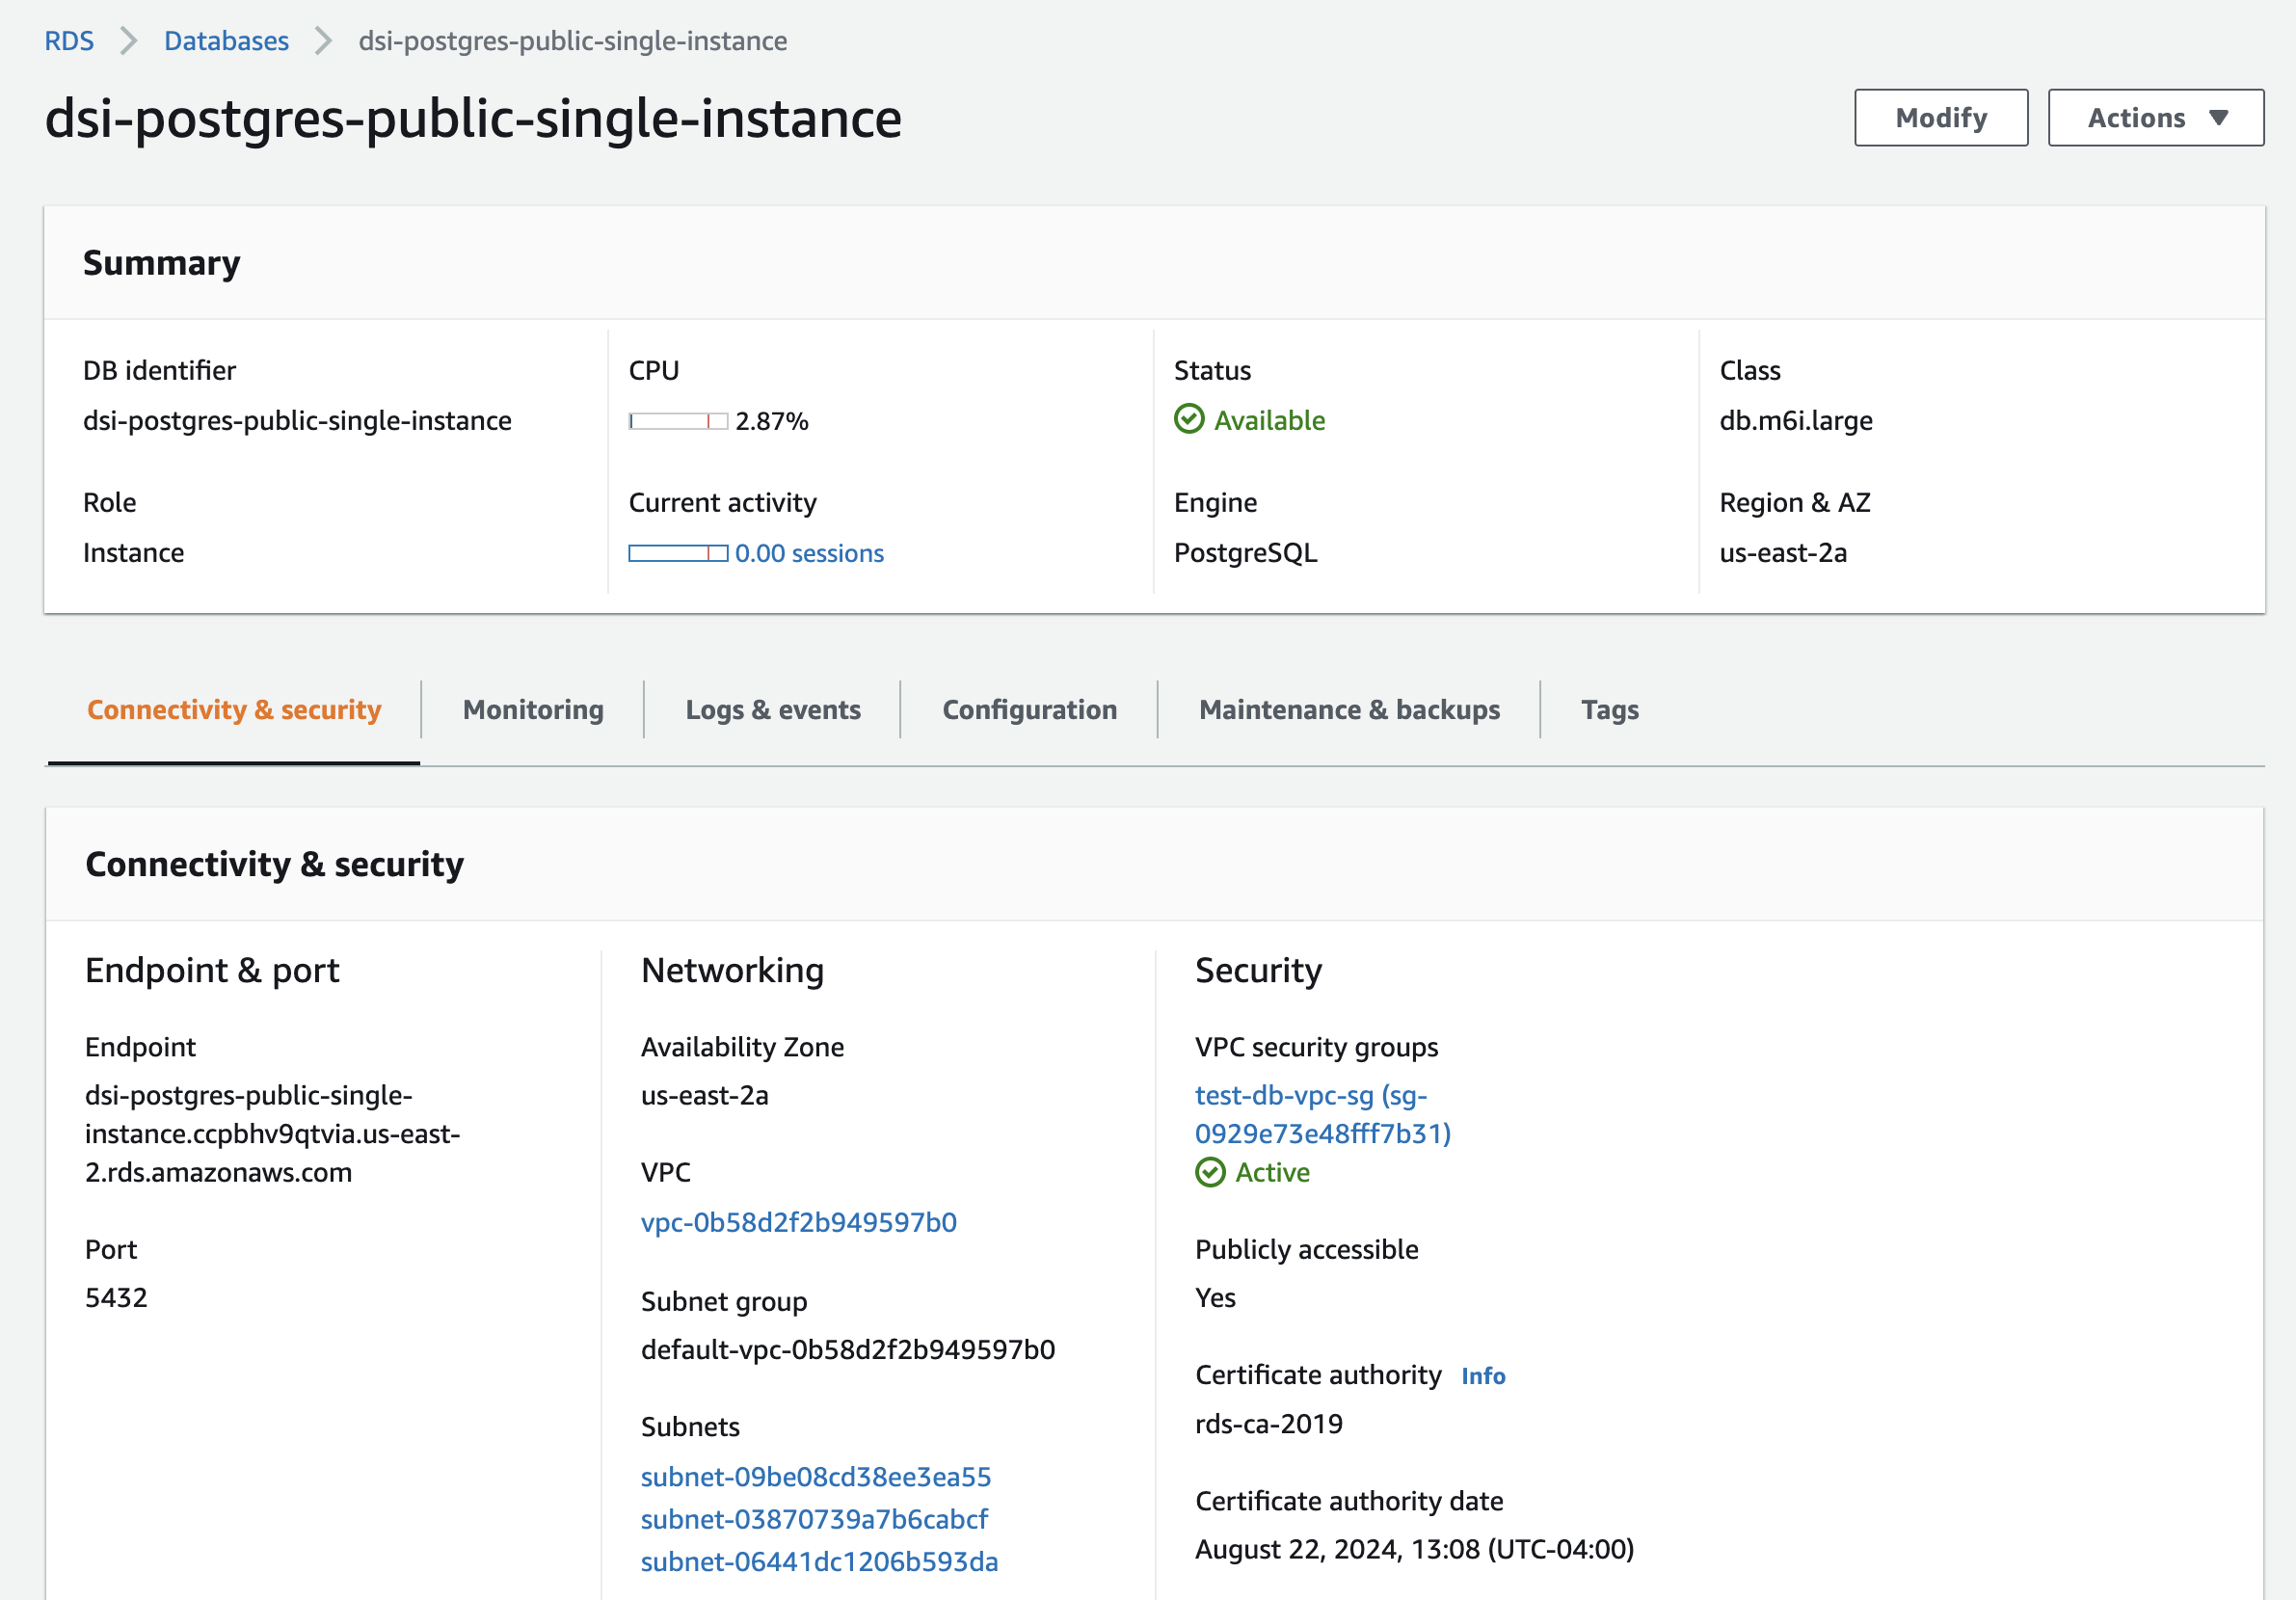
You need five pieces of information to connect a database to Equals: host, port, username, password, database password.Host & Port
- Find your database in AWS (first section above).
- On this page, you can find the
endpoint– which is thehost– andportin the Connectivity & security section:
Username, Password, Database name
AWS only gives you theusername and password for your database on creation, and the database name is set by you after creation. If you don’t have these details contact the person on your team that set up the database.
Allowing access from our IP
You likely need to allow incoming connections from Equals’ IP address. There are two parts to enabling access from outside AWS: turning on public access and adding a security group rule.Turning on “public access”
- Find your database in AWS (first section above).
- On the database details page ensure that Publicly accessible is Yes under Security. If it is, continue with the next section.
- If Publicly accessible is set to No, click Modify in the top right.
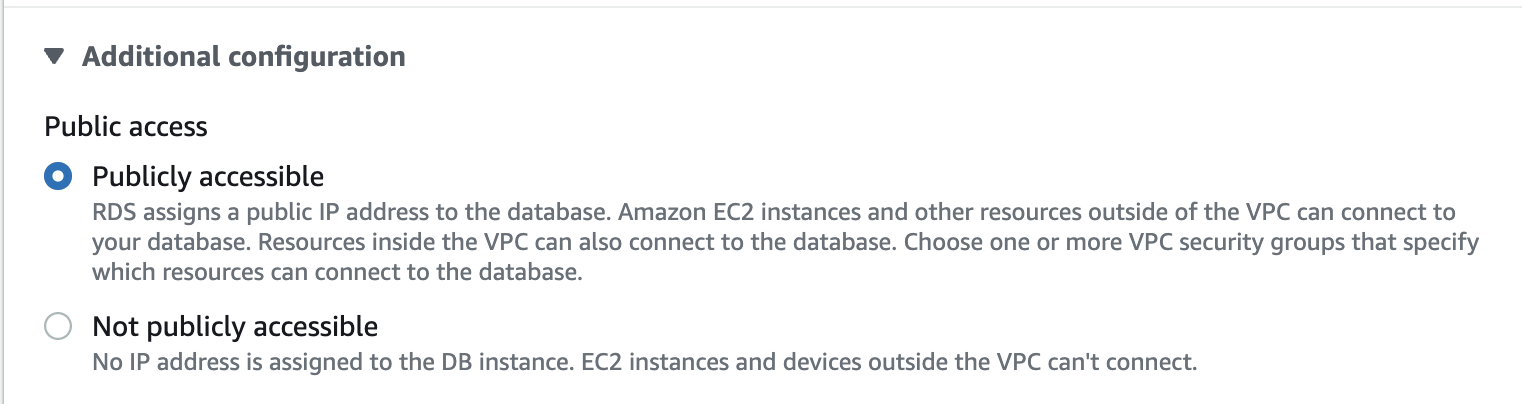
-
Scroll down to the Connectivity section and expand the Additional configuration subsection. Here you can enable public access:
- Head to the bottom of the page and click Continue
- Choose Apply immediately under Schedule modifications
- Save your changes by clicking Modify DB instance, the changes will be applied in a couple of minutes.
Adding a security group rule
- Find your database in AWS (first section above).
- Under the “Security” subsection within Connectivity & security click the security group. If the database is part of multiple security groups you should choose one specific to just this database – or create one if it doesn’t exist.
- Once on the security group page, click Inbound rules in the tab bar and then Edit inbound rules.
- On the Edit inbound rules page click Add rule.
- Choose Custom TCP for Type and enter the port for your database under Port range.
- For Source, choose Custom and then enter Equals’ IP address in the text field:
54.68.61.53/32. - Click Save rules. Equals should now be able to connect to your database.
Connecting to SQL databases AWS Redshift